
Adding a trellis to your raised bed is an excellent way to maximize the usable space in your garden. Spreading plants like squash, cucumbers, and zucchini are well known for taking over garden beds. Between munching pests and diseases, you need to get your plants off the ground and out of reach.
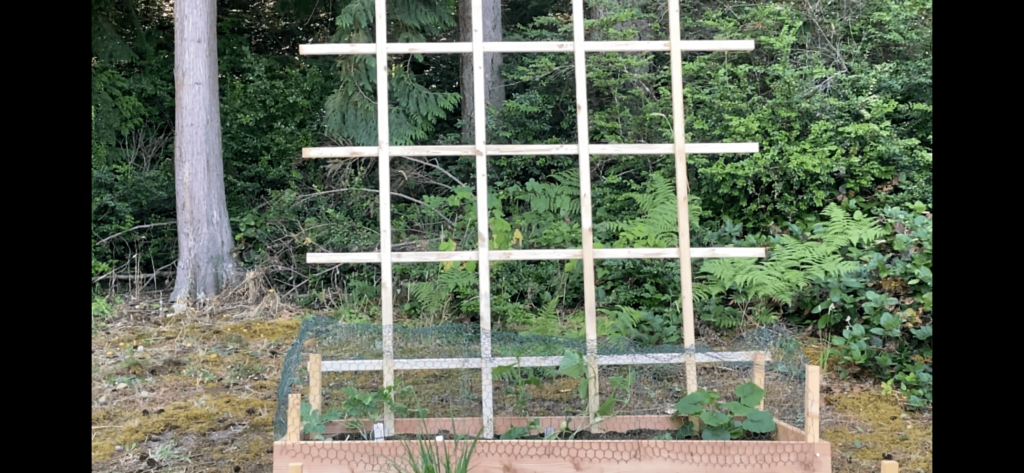
We built a simple and beautiful trellis for our raised bed. With just a few dollars worth of supplies, you can build one too in just under an hour.
You can watch our video on our channel to see the whole process:
Why Grow Vertically in a Raised Bed
Some plants naturally grow vertically, like tomatoes or peppers. These plants only need a cage or stake to make sure they stay upright when they get heavy. Other plants like to sprawl on the ground, like squashes and cucumbers.
When you have pests like rabbits and slugs I mentioned in a previous post, you want to protect your precious plants. I built a temporary cage around one bed.
I had originally planned for these plants to spill over the raised bed and across the ground. However, this offers them up as a tasty dinner to local wildlife. I noticed that the grazer only reached certain heights. Venturing a guess, I believe that getting my plants off the ground will keep these rabbits from eating them.
Powdery mildew first reared its ugly head as well. These tiny white spots appeared on my cucumbers just a few days ago. I cut off the offending leaves quickly. However, getting the plants up off the humid ground will help them dry out, keeping the mildew at bay.
Raised Bed Trellis Materials
We purchased 1″ x 2″ boards from a local hardware store. These 8′ lengths only cost us about $1.50 each. We got ten, though we ended up only using 8′ total. If your lumber store has the exact length you need you can have less waste. We cut ours down to 7′ lengths, intending to bury at least a foot. I wanted about 6′ in height to give my cucumbers plenty of room to grow.
To attach the boards together, we just used simple 1 1/2″ screws.
That’s it! It’s super easy. At a basic level, you just need the boards and screws. If you want to make sure that the spacing is even and the grid is square, you can grab a tape measure or ruler to help align the boards.
Step by Step Guide to Building a Trellis
Here’s how easy building this trellis is:
- Measure the width of your desired trellis. I chose the width of my bed.
- Pick a height you want your trellis. I recommend between 4′ to 6′, but no taller than you can reach.
- Count the number of boards you’ll need. I spaced my boards 15″ on center, you likely want yours 12-18″ apart. If your bed is 6′ long, and you space yours 1′ apart, then you’ll need 5 boards wide. If your trellis is 4′ tall with 1′ spacing, you’d need 3 boards.
- Cut your boards to length if necessary. You don’t need a powered saw, with small boards you can do this with a hand saw.
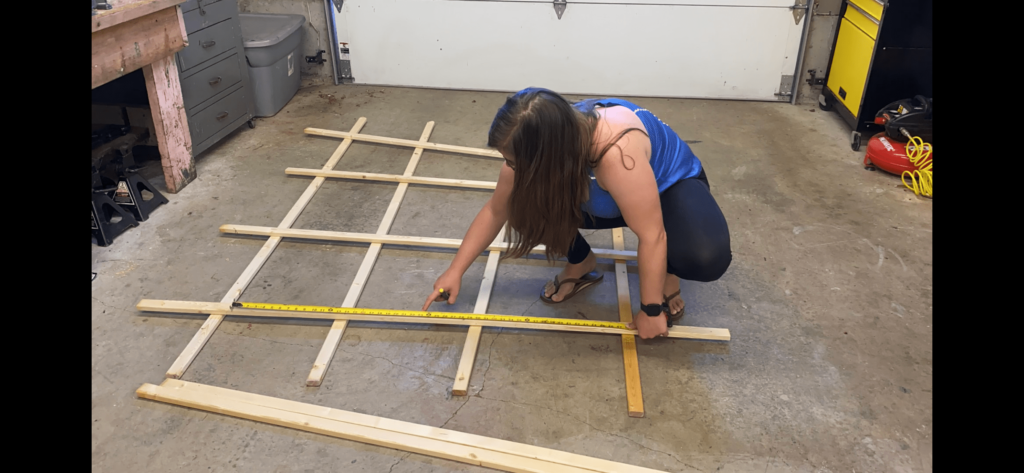
- Lay your boards out, aligned to their proper spacing. Use a tape measure and a right angle (such as a square) to ensure proper alignment.
- Screw one screw into each intersection.
That’s it!
You don’t have to buy a pre-made trellis from the garden store. Making your own trellis is super easy.