
One of the first projects that we decided to do after moving to Washington included building a new raised bed garden. I had one in San Diego that turned out to be fantastic; all of my plants grew phenomenally. For others out there, you may wonder if a raised bed is necessary for growing plants.
Raised garden beds are a great way to maintain adequate soil for your garden, prevent pests and diseases, and to make your life easier as a gardener.
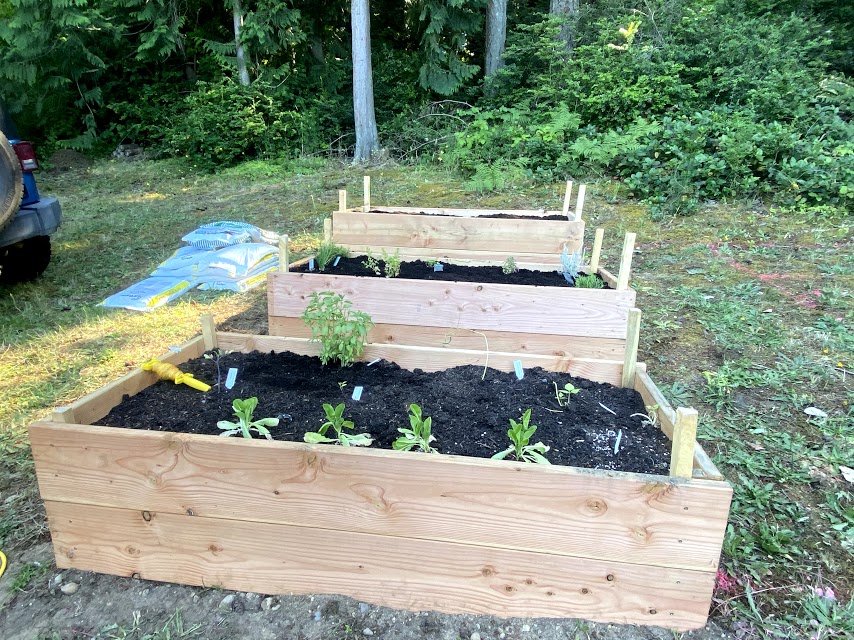
I recently posted a couple of videos on our YouTube channel showing how we’ve been progressing on our raised garden bed project. Here are some of the tips and tricks that we’ve learned along the way.
Constructing Raised Garden Bed Frames
In San Diego, we had a really flat patch of ground and made constructing our raised bed really easy. We used 4 x 4 posts that we just pounded into the ground and then screwed 2 x 12 boards into the posts. Here in Washington, we have a steeply sloping backyard. As I was constructing the first raised bed, I found driving the posts into the ground the hardest part even though they were only 2x2s, . The soil was insanely rocky and the slope made it hard to make sure that the posts were level in three dimensions.
A user on Reddit recommended that I construct the frame first on the ground and then move it into position. From there I could make sure that the box was level and then pound the stakes into each corner. Though, I do wish I had a real mallet like this one. Once I employed this trick, I managed to build my next two boxes in about half the time as the first.
For my raised beds, I developed a plan for six boxes each or 3’ x 6’. The 3′ width will hopefully ensure that I can reach the plants in the middle easily. I also like the symmetry of having two rows of three boxes with steps in between to match the steep slope of our backyard. I decided that I wanted my beds to be two 2x10s high, giving me about 20 inches of depth, which should be enough for most vegetables.
It also took a lot of time pre-drilling the screw holes and changing the bits to drill the screws. Then Phil brought up more screws, saying that the hardware store was out of a lot of options. These self tapping screws took less than half the time.
When working with the wood, I found that I really needed a pair of gloves that were versatile but durable. I liked this Digz goatskin gardening gloves. The leather was soft and supple, kind of like my husband’s work gloves.
Filling Raised Beds
Skip the gym membership and build your strength by hauling bags of soil and compost. Filling each garden box left me super sore and tired, but I didn’t really have another choice. The best vehicle we have for hauling supplies is my four-door Jeep, which makes it difficult to buy anything, such as soil, in bulk. With each load, we drove it into our backyard, up the hill, and then dumped the bags of soil and compost by the beds.
We chose to fill the beds with the same soil mix that we used in San Diego. This mix included an organic garden soil mixed in equal parts with steer manure and compost blend. Our soil here in Washington is pretty acidic, very sandy, very rocky, and pretty much nutrient depleted. If the soil had any sort of good quality, I would’ve tried to use fill dirt for my own backyard.
One of the benefits of having a raised bed garden is that the soil won’t get compacted as easily. It’s also easier to deal with pests by having a barrier between your good soil in the rest of the ground. You can also attach covering to the edges of the bed, or even copper strips around the border if you need to ward off slugs.
We hope you enjoy this post and checking out our YouTube channel. Please leave us a comment below if you have any tips or tricks or other suggestions.
One thought on “Building a Raised Bed Garden Tips and Tricks”